I have to admit, I was a bit intimidated before starting this job. When you look at those 6 big Keihin carbs it looks like quite the project to do a complete rebuild.
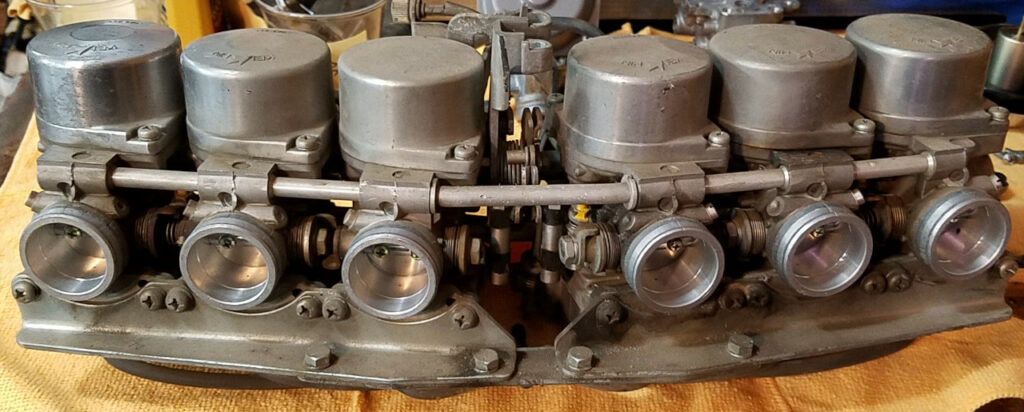
Fortunately, when you break the rack, the carbs break into tow sets of three carburetors. Something about doing a set of three seems much less intimidating that the full rack.
I did a bit of research before starting this project. I found Mike Nixon’s excellent booklet on rebuilding CBX carbs. I highly recommend the booklet to anyone thinking about rebuilding their carbs.
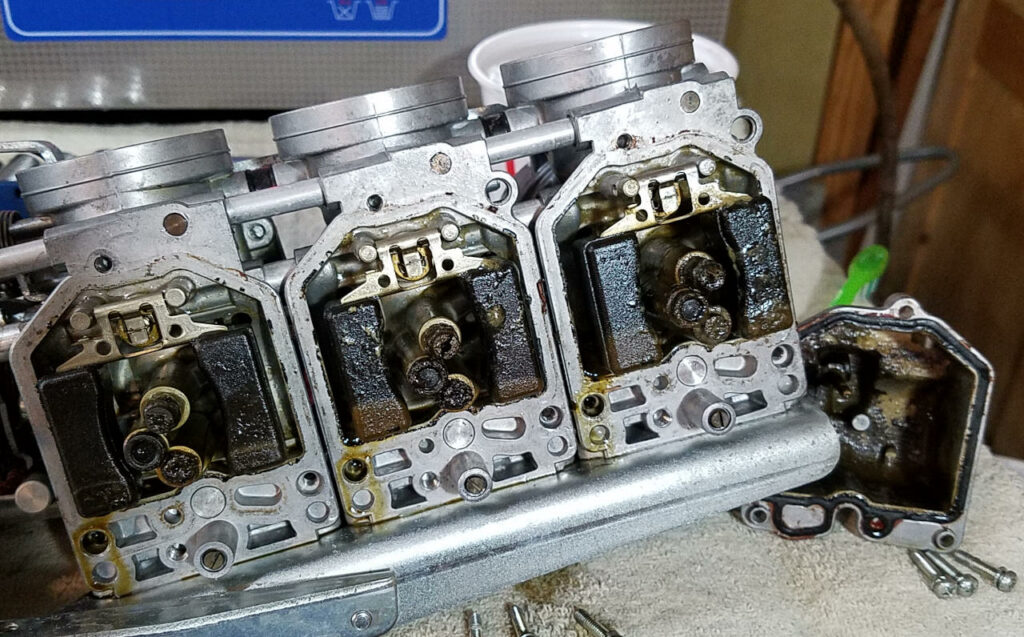
The carbs are full of varnish, but it’s nothing the ultrasonic and some carb cleaner can’t take care of. I like to process each carb as a unit in the ultrasonic. I use empty ice cream tubs and put the carb body and all parts for that carb into the container.
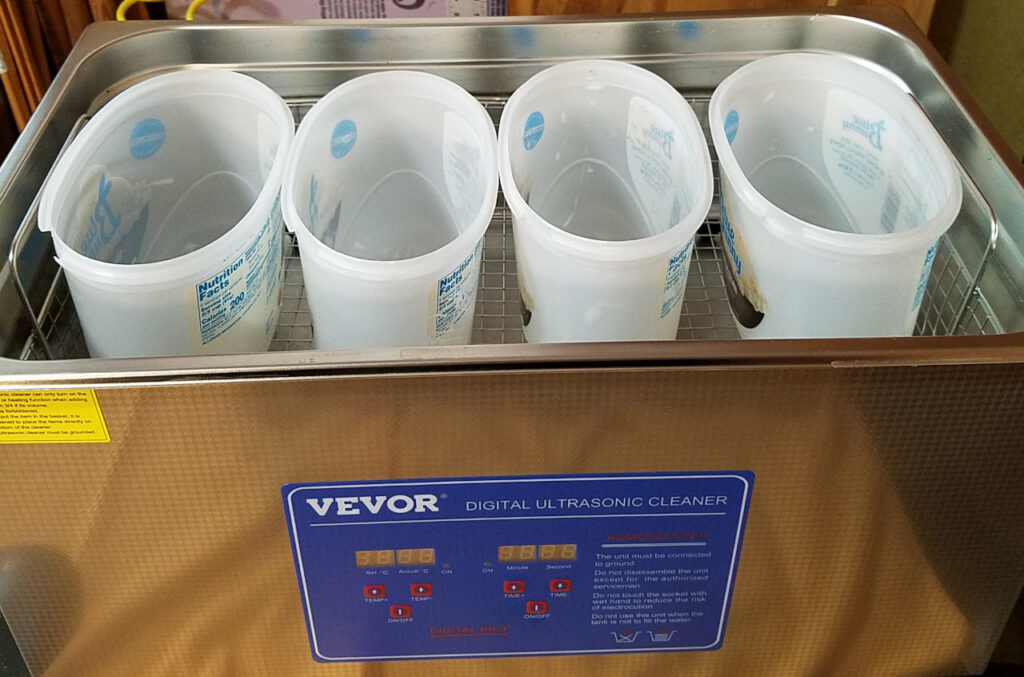
I strip each carb as much as possible before placing it in the ultrasonic. If I have jets or other bits that don’t want to come out, I leave them and run the carb through the cleaner. The heat and cleaning of the ultrasonic will often make “stuck” parts come “un-stuck”. Patience is the key. Don’t force anything and you will find that the jobs goes along smoothly. Getting in a hurry usually comes back to bit you, and costs you time in the long run.
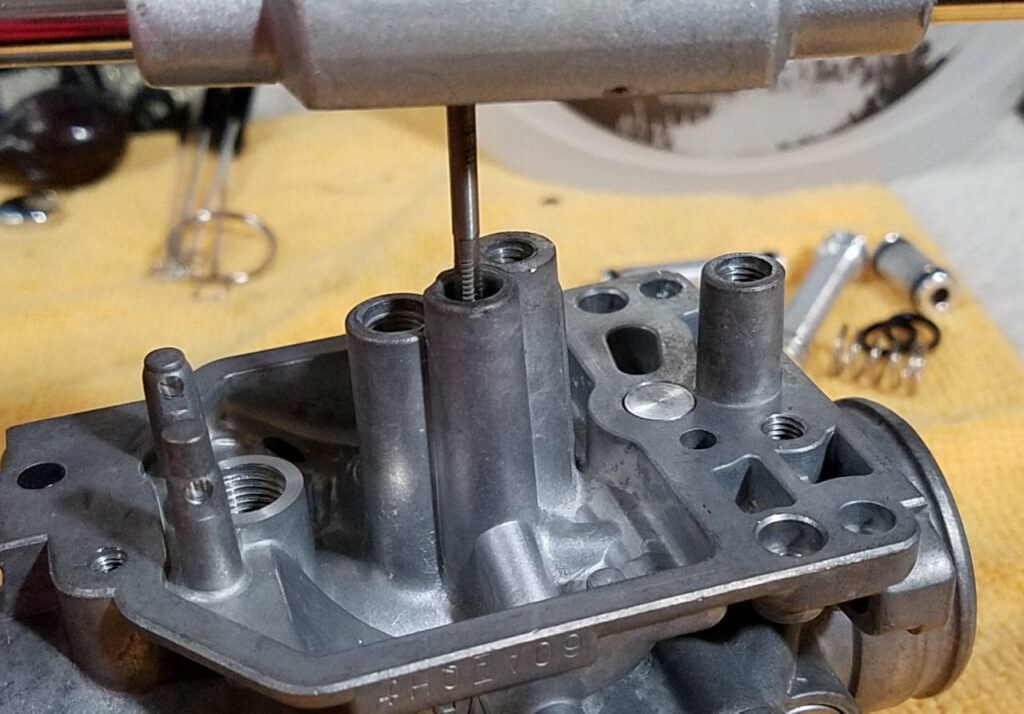
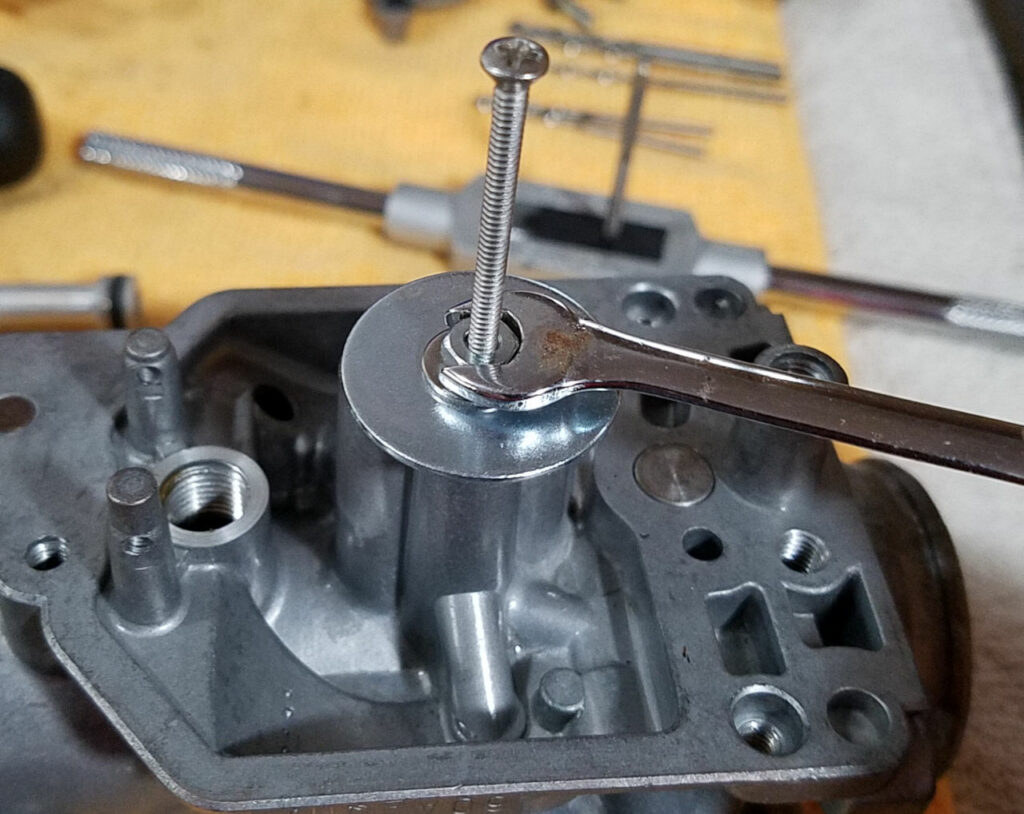
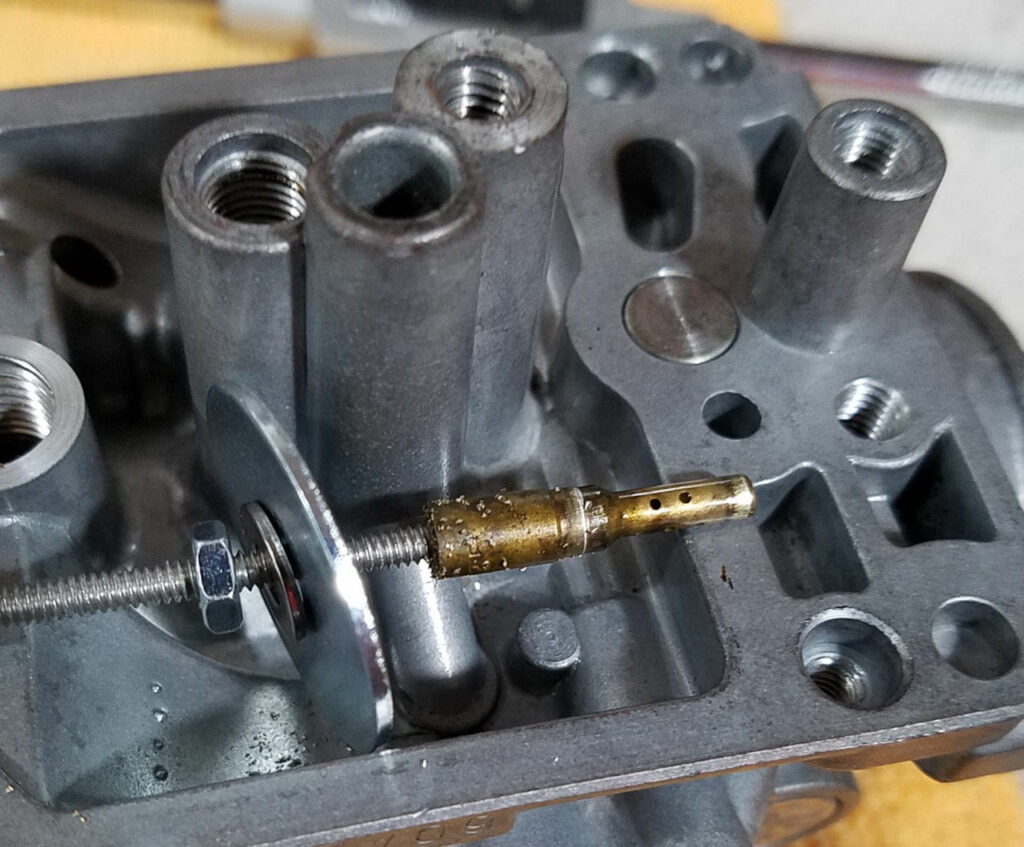
The idle jets in these carbs are pressed in. Following the directions in Mike’s booklet, I tap threads into the jets and use a screw to pull the jets from the carb bodies…
All in all, there are around 300 pieces in the set of carbs. I replaced all the rubber bits along with the float valves. All the factory brass parts were cleaned and re-used. This is generally the preferred method when rebuilding carbs as the new brass supplied in many rebuild kits is not of the quality found in the original factory parts.
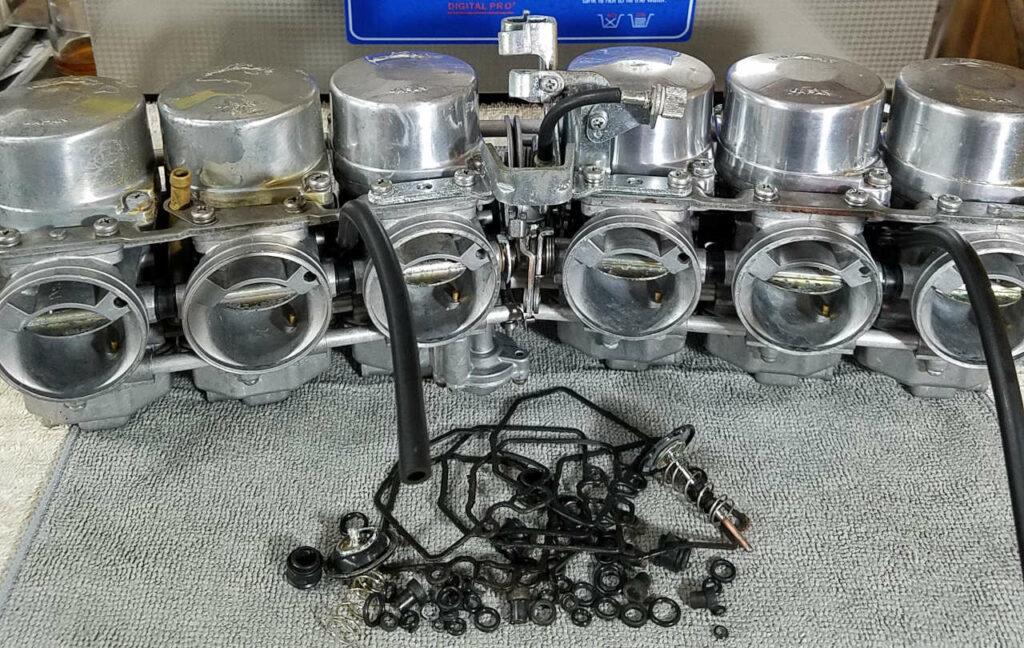
I purchased my carb rebuild kits, choke shaft seals, and air-t’s from Randakks, https://www.randakksblog.com/randakks-master-carb-overhaul-kit-for-honda-cbx/ My float valves came from PJ Motorsports, https://www.pjmotorsports.com/
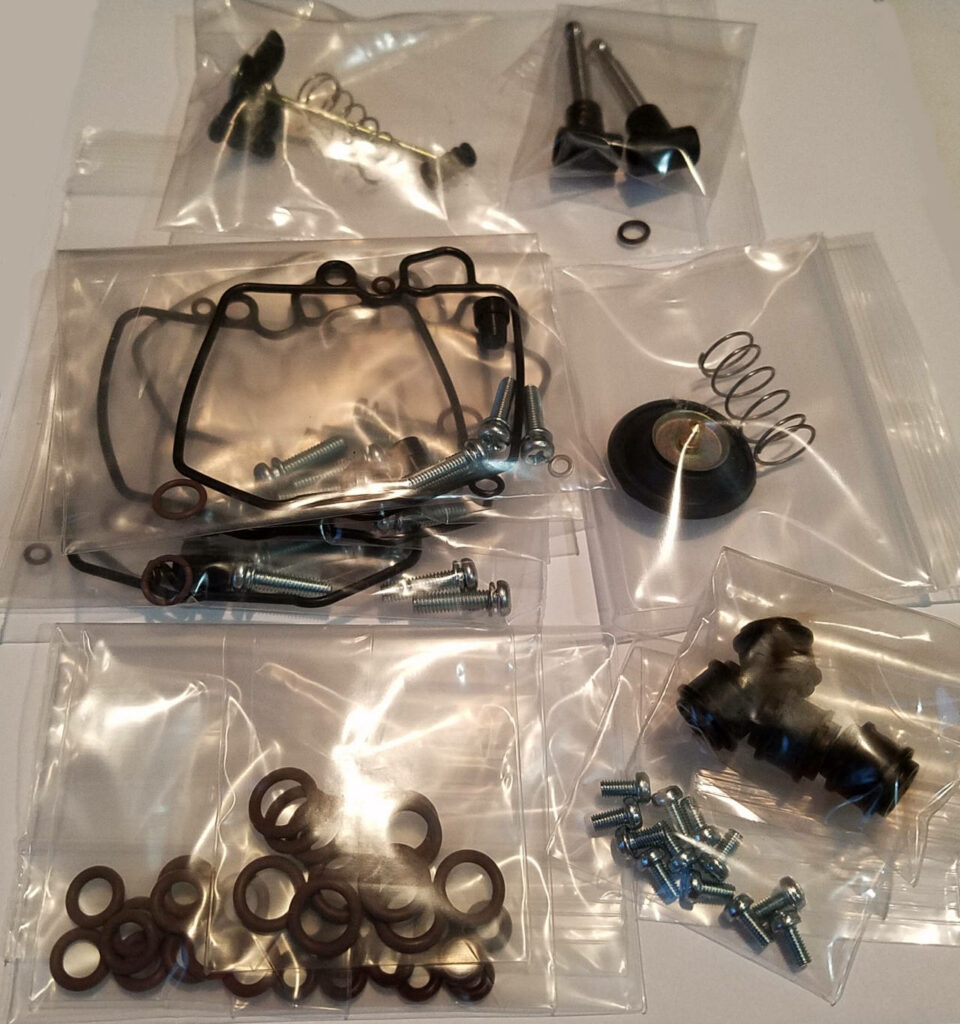
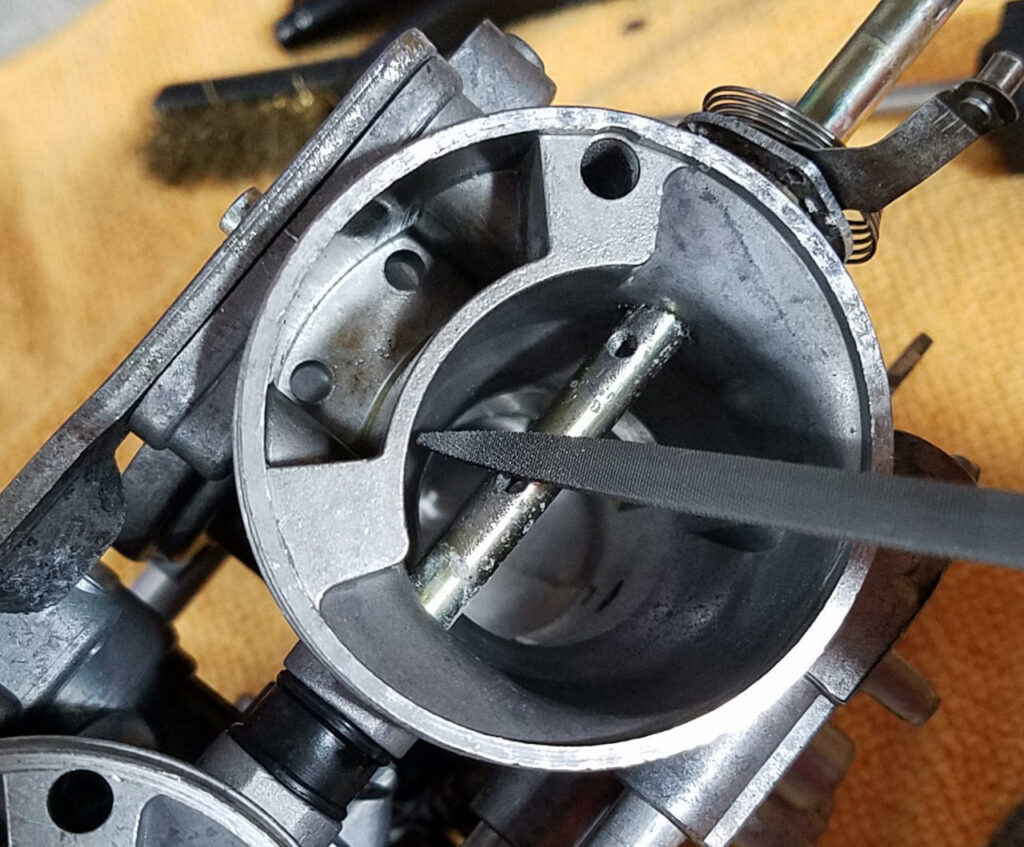
The carb kits from Randakk’s come complete with the air cut-off valve and accelerator pump valve. The kit also includes new screws for the choke butterflys. You want to file off any burs before removing the choke shafts, and also chase the threads before installing the new screws.
I was very happy with how the carbs turned out. I did a bench sync using the procedure outlined in Mike’s booklet and the bike starts and idles perfectly.
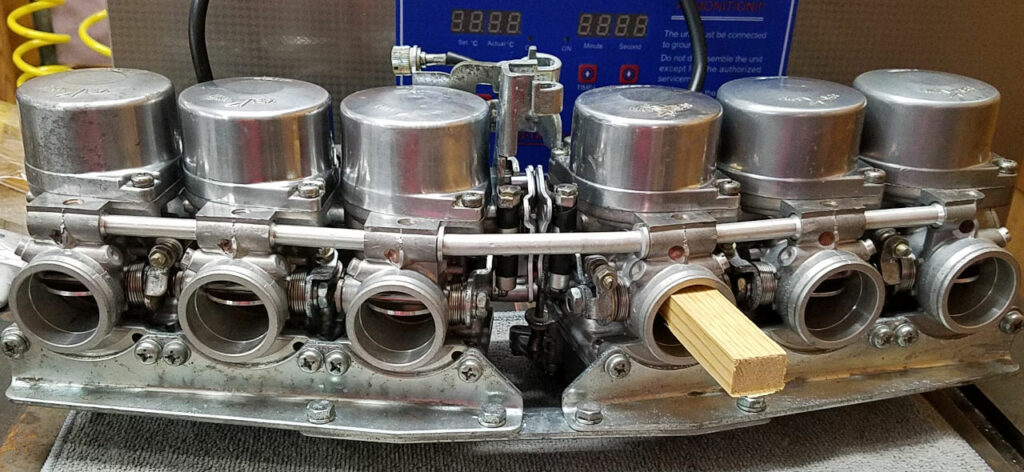
The block of wood is holding the throttle wide open and aids in getting the cables hooked up when putting the carbs back on the bike.